Women adore decorating themselves with gold, precious stones, beads, bows, brooches and pendants.
All these pleasant little things make style, character and mood.
In addition, buying jewelry in a store is not necessary - it has long been fashionable to do it yourself.
DIY lily of the valley bead necklace
This necklace will help to make the image more feminine and sophisticated. Imitation pearl beads. Gilded Shine. And a dress with a neckline.
Materials: pins with a ball tip 25 mm long 80 pcs., beads of artificial pink pearls of elongated shape 7 mm long., rondelle (metal flower) 80 pcs., decorative clasp, round-nose pliers.

Stage 1
A pink pearl bead and a metal flower are strung on a metal pin. With a pair of round pliers, a loop is bent at the tip of the pin, as in the figure.

Stage 2
The next metal pin is taken. A bead and a rondelle are strung on it. After that, the pin is threaded through the bent loop of the previous pin and also bends.

Stage 3
Similar actions are performed with the remaining pins and beads.

The assembly technique is extremely simple. At the end of the work, the last pin at its tip bends in the ring of the decorative lock.
Do-it-yourself necklace master class "Arabica"
This necklace is expressive of its large beads. Unlike a classic necklace, it does not require a combination of an evening dress.
Materials: pearls beads 14 mm, chain 45 cm, decorative clasp, rondelle, transparent round beads, round pliers, pliers.

Stage 1
Carnation is taken (the so-called "rondelle"). On it is strung 1 pc. transparent beads. Next, a large bead of pearls is strung.

Stage 2
A clove with a bead and a bead is attached to the chain. The edge is bent with pliers.

Stage 3
Thus, a carnation with a previously stringed pearl bead and a bead is inserted into each link of the chain.
Stage 4
At the end of the work, a decorative lock is attached to the ends of the chain. A necklace made by yourself in the master class with a photo is ready.
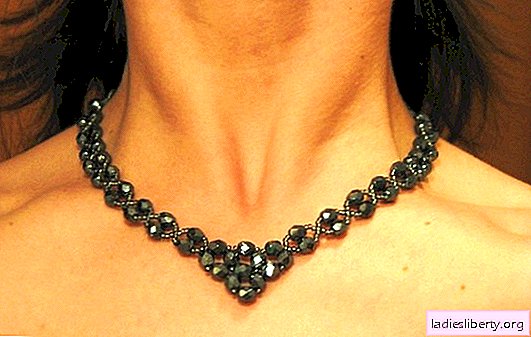
Do-it-yourself beaded necklace with Lela photo
This necklace is the aerobatics of weaving. It looks like a royal decoration. It is as if all the female affection and bliss in him were collected by the inventor.
Materials: pearls beads from 5 to 10 mm, beads transparent under No. 11 30 gr., needle for beads and fishing line (it is recommended to use a special “fishing line for beads”, which has the strength of the wire and allows the beads to lie on the body, and not stand if you use the wire )

Stage 1
One bead hangs on a fishing line. It is fixed with a tailor’s needle (with a ball on the end) on a weaving pad. You can use any other tightly packed pillow.

Stage 2
The necklace has sides - right and left. A set of beads occurs on the "right side" and on the "left side". From the tailor's needle, stuck in the pillow at the beginning of work, two fishing lines come out - to the left side, to the right side.
On the "right side" is typed 4 beads.
Stage 3
On the "left side" is typed 2 beads and another 10. The latter become the beginning of the leaf. The fishing line is threaded into the second bead from the end.

Stage 4
8 more beads are strung. They pass through the "left side" into the second bead.

It turns out a cute little leaf.
Stage 5
On the "left side" is typed 1 bead. She hangs on the 4 right side bead.

Stage 6
A second sheet is made on the "right side". 4 beads are strung, and then 2 and 10 on the "right side", which pass into 2 beads at the end. The next 8 pieces of beads are passed through 2 beads at the "left side".

Stage 7
Finally, from the petal you need to insert a pearl bead. To do this, the fishing line passes into the first three beads of the leaf, as in the picture.

A bead of pearls hangs on a fishing line. The line passes into 3 beads from the end of the sheet and through the base bead.

Stage 8
Leaflets need to be interconnected. To do this, take 1 bead and fishing line is carried out in 3 bead of the very first leaf.

Next, another 1 bead is taken and the fishing line returns to the base of the leaf with a pearl bead.
Stage 9
Further, all the work is already "on the beaten track." 1 bead is taken and the fishing line passes into 4 bead from the "left side". The second leaflet for a do-it-yourself necklace in the master class with a photo is ready!
Stage 10
Next, the remaining leaves are woven. Beads with pearls are inserted in turn. The size of the beads can be increased in the middle of the necklace. The length of the side of the leaf will also, accordingly, increase by 1 bead. The number of binding beads between the leaves will also grow.

Stage 11
The branches at the end of the work are sewn together with a separate fishing line in the right places.