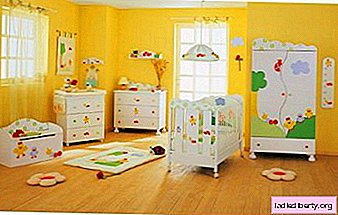
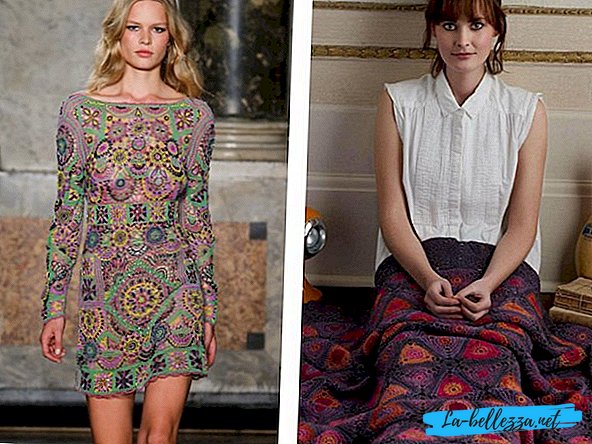
The ability to knit motifs helps needlewomen to work on a variety of products. In crochet motifs are used to work on the following items of clothing and life: jackets, tunics, jackets, cardigans, tops, shawls, vests, skirts, bags, ponchos, and many others, as well as very popular in the manufacture of knitted household items such as tablecloths, napkins, potholders, blankets, pillowcases for pillows and lace trim textiles.
Patterns and description of crochet motifs
The use of motifs is a very common practice among the majority of crochet admirers, so it is important to regularly replenish your piggy bank of patterns for motifs. Let us consider in more detail the crochet motifs of all possible forms and different levels of complexity.
Simple round
Simple crochet round motifs will help beginning knitters to learn how to work with more complex forms of motifs, so it is important to start with them. Experienced knitters use simple round motifs as additional elements in more complex products including a variety of motifs. Consider some simple crocheted round motifs with detailed photos and descriptions of the progress.
- Round two-tone motif
This motif looks great in two-tone yarn in contrasting shades. It turns out pretty festive and cute, besides, with a slight effect of openwork. It will look great on bags, sweaters, skirts, tablecloths and many other crocheted products.

Pattern of knitting motive:

Working process:
1 row (burgundy): 2 lifting air loops, 11 posts with 1 double cap in the initial ring.
2 row: (white): 2 lift air loops, * 1 air loop, a column with 1 square in the leg of a column with 1 branch of the previous row * - repeat 11 times, 1 air loop, close the row with a connecting column;
3 row (white): 1 air lift loop, * 3 columns without a crochet into the arch of the air loop of the previous row * - repeat 12 times, close the row with a connecting column;
4 row (burgundy): 1 lift air loop, * 3 air loops, 1 single crochet into the leg of the column with the 1st nakida of the previous row * - repeat 11 times, 3 air loops, close the circle with a connecting bar;
5 row (burgundy): 1 air lift loop, * 4 columns without a nakid into the arch of 3 previous loops of the previous row * - repeat 12 times, close the row with a connecting column;
6 row (white): 1 air lift loop, * 4 air loops, 1 single column in the leg of the previous single line column * - repeat 11 times, 4 air loops, close the circle with a connecting column;
7 row (white): 1 air lift loop, * 5 columns without a crochet into the arch of 4 air loops of the previous row * - repeat 12 times, close the row with a connecting column;
8 row (burgundy): 1 air lift loop, * 5 air loops, 1 column without crochet into the leg of the column without single loop of the previous row * - repeat 11 times, 5 air loops, close the circle with a connecting bar;
9 row (burgundy): 1 air lift loop, * 6 posts without crochet into the arch of 5 air loops of the previous row * - repeat 12 times, close the row with a connecting post.
You can continue to knit further to the desired diameter, adhering to the principle: in each even row add on the 1st air loop in each arch, and in each odd row - add on the 1st column without single crochet in each arch.
- Magic mandala
A beautiful motif with distinctive color features and a meditative semantic background will look wonderful on handbags, skirts, jackets, pillows, as well as a separate decorative piece of furniture. The motive consists of nine different-colored rows, the colors can be selected by oneself, the main thing is to choose the favorite ones.

Abbreviations to the description of knitting:
VP - air loop;
Sc - column without nakida;
SSN - double crochet;
CC2N - column with two naquids;
PS1N - magnificent column with one double cap;
SS - connecting stub.
Knitting features:
We knit a mandala in a circle, connect the end and the beginning of each row with the help of the SS.
We hide each “tail” of the previous row in the next row: we lay along the row and we seize when knitting together with the loops, we cut off the tip. The first “tail” of the double loop is simply cut off - it itself is sufficiently fixed and will not go anywhere. Thus, in the end we will have to hide with a needle only one “tail” - the very last one.
Working process:
1 row: we make a “double loop of amigurumi”, we knit 3 VP of lifting and knit in loop 11 of CCH.
2 row: [1 sc, 2 ip] to the end of the series.
3 row: [1 PS1N, 3 VP] to the end of the series.
4 row: [5 SSN] between every two PS1N.
5 row: we lay a "pigtail" of the SS over the previous row, pulling the thread between the CCH.
6 row: [1 PS1N, 7 VP] to the end of the series.
7 row: [1 PS1N, 7 VP] in the same previous row (in this case - yellow), but with a shift of 2 loops.

8 row: [4 SSN, 5 VP] to the end of the row, capturing at once two rows of VP from the two previous rows.
9 row: [12 CC2H] in each arochka of 5 VP previous row. Crochet mandala motif ready.

Triangular
Things with triangular elements look very interesting. Triangular crochet motifs almost always have airiness and openwork, which is convenient to use in the manufacture of various models of clothing.
- Tight triangle
Knitted triangular motifs are of varying complexity, some of the most simple - in the style of a grandmother's square. Let's try to begin to understand the knitting of such a dense triangle.

Pattern of knitting motive:

Working process:
This triangle fit in a circle. Making the initial ring with a loop.
1 row: knit 3 vp (photo 1), then in a ring we knit 4 tbsp. s / n (photo 2), then knit 2 vp (photo 3), further 5 tbsp. s / n, and again 2 vs (photo 4).

Then we perform 5 tbsp. s / n and 2 more VP (photo 1). Tighten the loop and close the connection row. Art., introducing the hook into the top loop of the rise of this row (photo 2).

2 row: 3 vp (photo 1), then knit in every c / n before. rows of 1 tbsp. s / n (4th c. s / n) (photo 2), in the arch from the ce before row knit 2 tbsp. s / n, 2 ce and another 2 tbsp. s / n (photo 3), in each trail. Art. s / n before a number of knit 1 tbsp. s / n (5 items. s / n) (photo 4).

In the arch we knit the same 2 tbsp. s / n, 2 paras, 2 tbsp. s / n (photo 1), then 5 tbsp. s / n (photo 2), in the arch 2 tbsp. s / n, 2 paras, 2 tbsp. s / n Closing the row connection. Art., introducing the hook into the top loop of the lift (photo 3).

3 row: 3 vp (photo 1), then in every art. s / n before a number of knit 1 tbsp. s / n (6 st. s / n) (photo 2), in the arch, in the same way as we knitted in the last row - 2 st. s / n, 2 paras, 2 tbsp. s / n (photo 3), * further in each Art. s / n before a number of knit 1 tbsp. s / n (9 st. s / n), in the arch we knit 2 st. s / n, 2 paras, 2 tbsp. s / n *. Repeat from * 1 more time. And we add another 1 tbsp at the end of the series. s / n in art. s / n before rows (2 items. s / n). Closing the row connection. Art. in the upper loop of the rise (photo 4).

Subsequent rows are knitted similarly, carrying out 4 additional art. s / n on each side of the triangle. This way you can link triangles of different sizes. Also, each row can be started in a separate color.
- Elven motive
A beautiful triangular motif made in the technique of Irish lace, from which you can also make incredible finest openwork circular motifs. Let us consider in detail how to crochet this triangular motif.

Pattern of knitting motive:

Working process:
We start with the 6th c. closed in a circle, then proceed to knitting in rows according to the scheme.
1 row: at. Clause 12 Art b / n,
2 row: at. Clause, Art b / n, 2 Art b / n in one, 2 Art b / n, * 6 in. Clause 10 in. com. loop in the 10th c. from the hook — the first ring of the trefoil is obtained — we tie it up: st b / n, st, 10 st s / n, st, st b / n; then knit the second ring, top, - 10 in. com. loop in the 10th c. P.
from the hook and tied in the same way as the first ring, then we knit the third - the last, just like the first two ... and knit 6 articles w / n into a chain of 6 in. n * ... further art b / n in the first row column, 2 art b / n in one, 2 art b / n and we repeat everything from * to *, again art b / n in the first row column, 2 art b / n n in one, 2 st b / n and another din trefoil, we finish a number of connections. loop in c. to lift
3 row: 2 connections hinges, * 5 in. Clause 3 of Article C3 / n, 5th c. Clause, Art b / n in the 6th century with / n the first ring of the trefoil, 15 in. Clause, Art b / n in the 6th century with / n the second ring, 15 in. p., st b / n in the 6th st c / n of the third ring, 5 c. Section 4, Article C3 / N, in addition (2 ArticleCn / per one) * continue from * to * and end the connection series. loop in lift loops
4 row: at. Clause 5 of Art. 7 in. n. Section instead of Article B / N, t. To. So far, there is nothing to cling to (in the following places instead of Article B. Section B / N), 4 Article B / N along this chain from the 7th century. p., picot from 4 in. p., 4 items b / n, (3 items b / n, pico from 4 in. n.) repeat 3 times, 9 items b / n, turn over 5 knitting. Clause 4 of Article C3 / n in the 3rd Article w / n counting backwards along the row, 5th c. p., st b / n in the 6th st b / n, counting back along the row, turn over knitting, 3 st b / n along the chain of 5 c. p., picot of 4 in. Clause 3 Art b / n, Pico of 4, 3 Art b / n, Picot, 3 Art b / n, and further along the chain of 15 c. Section of the previous row - (3 stb / n, pico) 3 times, 3 st b / n ... and so we repeat to the end.
But such a round motif is obtained from the connection of these triangles:

Square
Square crochet motifs are very popular with novice needlewomen as well as professionals, because they are knitted quickly and easily. The motifs of this form may consist of light patterns or contain complex convex elements.
- Grandma square

One of the most common and popular square motifs is grandma's square. This is a classic motif, which is used for knitting a variety of products.
Materials for work:
- yarn (cotton, acrylic, wool);
- hook under the yarn.
Working process:
Knitting a grandmother's square begins with knitting the base. You can start knitting with an amigurumi ring instead of air loops, however, it is shown here how to tie a motif with a loop basis.
We knit five air loops with a yellow thread.
Hook we start in the last eyelet from the hook and stretch the working thread so that the hook has 2 loops. We stretch one of the loops through the other in order to get one loop on the hook. The chain of air loops closed.
A new row begins with three loops of rise.
Putting the hook into the ring of air loops, we knit two columns with one nakida, and we take three air loops as another double crochet.
In order to have vertices on a square motif, you need to knit three air loops between three columns with one nakida. We knit three vozd. loops and again hooking the hook into the ring we knit already three columns with one crochet.
Similarly, knit and all the other vertices for the grandmother's square. At the end of the row we complete it with a semi-column, setting the hook in the third air lift loop.

In the second row, change the thread to gray. To do this, through the loop from the yellow thread, we will stretch the gray thread and weave the air loops. Tighten the yellow thread, but do not cut. Air loops need to knit 5.
We approach the first vertex of the square and then knit 6 columns with one nakida, and between them three air loops. In this way, all the vertices of a square motif are crocheted or of a grandmother's square.
Between the peaks in this series we knit two air loops. We knit the second vertex of the square in the same way as the first.
Knit all the vertices of the square and end the row with a semi-column. It is important to remember that the three air loops at the beginning of a row are counted as the last column with one double crochet at the end of the row.

The third row for the motive begins with knitting three air loops and two columns with one double crochet.
We knit the third row and end it with a semi-column.
We turn to knitting the fourth row and knit it just like all the previous rows for the square crochet motif.
To make this square motif bigger, knit another two or three rows. Secure and cut the thread.

- Flower square
Similar to Grandma's square motif looks a little more intricate, especially if you knit it with multi-colored threads. Beautiful and simple motive is suitable for many knitted things useful in the kitchen. Let's take a closer look at how to crochet it.

Abbreviations to the description of knitting:
- remnants of cotton yarn in different colors;
- hook number 2.5.
Pattern of knitting motive:

Working process:
The knitting of each square motif begins with an amigurumi loop or from a chain of air loops. Enough to dial 5-6 v. To close them into the ring and knit 3 more v. P. for lifting and transition to knit the first row of square motive. Immediately it is important not to forget about another ce. for lifting. Total vyvyazyvaem 4 ce.
The first circular row of a square motif consists of 12 crochet motifs, where the first 3 ip are counted as 1 CH. In other words, in the first row you need to tie 11 CHs. This series ends with a connecting semi-column. The thread of the last row must be fixed and cut. It is no longer needed.
The second row will be knitted with a blue thread and start it from three times. and magnificent column.
How to knit a magnificent column:
A working thread is thrown onto the hook, a hook is inserted under the loop of the previous row and the working thread is seized. Pull it out so that it turns out 3 crochets on the hook. Once again, make a hook on the hook, wind it under the loop of the previous row, pull the working thread. On the hook should get 5 nakidov. After five loops on the hook, stretch the working thread and leave 1 loop on the hook.
According to the scheme, between the lush columns, you need to tie it in 2 volts.

In the second row of this motive should be formed vertices. The top of the square will consist of three ce, c2h and three more ce
We collect 3 VP, we knit C2H and 3 more VP Next, following the pattern, you need to knit four vertices for the square. In this series it will be clearly seen that the crocheted knitted motif has become square in shape.
In the next third row, you need to replace the thread again, and fix and cut the thread of the previous row.
Row the third begins with three ce. and two CH. In this case, 3 V. p. Will be taken for one CH.
We knit according to the scheme the third row with single crochets.
The fourth row - this will be the last row for the square motive. It consists only of CH. We finish the 4th row, getting ready motive.

- Mysterious square
An interesting way to knit a regular square is to play with shapes inside the square, which can be expressed in contrasting colors. In this case, inside the motive there are small triangles that are visually connected in squares.

Square knitting scheme:

Abbreviations in the scheme:
vp - air loop;
Sc - column without nakida;
PSN - semi-column with a cap;
SSN - double crochet;
CC2H - a column with 2 nakida.
Working process:
1 row: 5vp connect using a connection column in the ring.
2 row: 2vp (count as the first sc), sc in the ring 15 times, connect with the 2nd run-up of the initial chain.
3 row: 4vp (count as 1st SSN), * PSN, SBN, PSN, CCN *, then repeat from * to * twice, PSN, SBN, PSN, connect to the 4th run of the initial chain. Change the color.
4 row: attach color B to the next column, * sc, psn, csn, cc2h, 4vp *, and repeat from * to * three times. Connect with the first sc and finish working with this color.
5 row: attach color A at the beginning of the arch from 4vp. * (2 SBN, 2 PSN in the same arch), 2 CCH, 2 Cc2H, 4 VP *, and repeat from * to * three times. Connect with the first sc and finish working in this color.
6 row: attach color B at the beginning of the arch from 4vp. * (3 SBN, PSN in the same arch), 2 PSN, 3 CCH, 3 Cc2H, 4vp *, and repeat from * to * three times. Connect with the first sc and finish working in this color.
7 row: attach color A at the beginning of the arch from 4vp. * 4 sc in the same arch, 4 psn, 4 csn, 4 cc2h, 4vp *, and repeat from * to * three times. Connect with the first sc and finish working in this color.
8 row: attach color B at the beginning of the arch from 4vp. * 4 sc in the same arch, sc, 5 psn, 5 csn, 5 cs2n, 4vp *, and repeat from * to * three times. Connect with the first sc and finish working in this color.
9 row: CCH in each column of the previous row and in the arch: CCH, 3vp, 4 CCH. Connect with the first SSN. Finish working in this color.
10 row: attach color A to the corner arch. 4vp (count as 1st CCH), 3vp, CCH in the same arch,% * 1vp, skip the next column, CCH *, repeat from * to * to the angular arch, CCH, 3vp, CCH,%. Repeat from% to% twice, and from * to * once, connect to the 4th vp of the initial chain.
11 row: 5 CCHs in each corner arch, and 2 CCHs in each arch of the 3rd front row.
12 row: 3 sc in each corner of the previous row and sc in the remaining columns. The square is ready.
Hexagonal
Patterns of hexagon motifs are often used by needlewomen to knit large objects of decor, such as tablecloths, bedspreads, blankets, curtains, napkins, and others, but are also popular when creating blouses, dresses, cardigans. With a hook, you can connect a hexagonal motif according to your idea: whether it is a thin open-ended hexagon, or a dense warming motif. Consider both variants of knitting motifs of this beautiful form.
- Openwork hexagon
A floral pattern made up of a multitude of elements creates a beautiful multi-syllable motif suitable for a wide variety of products. Consider in detail how it can be linked.

Knitting scheme:

Working process:
To start knitting, type 12 air loops and join them into a ring with a deaf loop. Next, knit 1st row: make one air lift loop and knit 24 st. b / n, finish a row of connecting loop in the lift loop.
2nd row: 3 air lifting loops + 1 rev. loop, then knit a double crochet from each loop of the previous row. a loop. Linking the first three columns, dial a chain of 10 vozd. loops and close it in a loop, linking on top of the last column - Art. b / n Next * Art. s / n, 1 rev. loop, dial 10 again. loops and close the chain in a loop, linking art. b / n from the top of the last column, repeat from * 3 more times. Then knit 4 tbsp. с/н чередуя их с воздушными петлями, вместо последней воздушной петли сделайте столбик без накида в последнюю петлю подъема, далее для вязания последней петельки наберите цепочку из 5-ти возд. петель и вяжите столбик с тремя накидами, вводя крючок в последнюю петлю подъема. Заканчивается ряд на вершине петельки, которая будет основой вывязывания лепестков в 3-м ряду, а всего должно быть 6 таких петель (фото 1).
3rd row: наберите 4 возд. петли подъема, 4 ст. с/2н, 4 ст. с/н, ст. б/н, *следующий лепесток вяжите вводя крючок в следующую петлю 4 ст. с/н, 1 ст. с/2н, далее вяжите арочку из столбика с четырьмя накидами, вводя крючок в последний столбик с двумя накидами предыдущего лепестка, затем 9 ст. с/2н, 4 ст. с/н, закрепительный ст. б/н, повторите от* еще 4 раза. Заканчивайте ряд на недовязанном лепестке, сделав 4 ст. с/н, 1 ст. с/2н, арочку между лепестками - ст. с/4н, 4 ст. с/2н, соединительная петля в последнюю петлю подъема (фото 2).
4th row: начинается с 9-ти возд. петель подъема, далее из арочки предыдущего ряда вяжите 6 ст. с/н, петелька из 13-ти возд. петель замкнутых столбиком без накида, 6 ст. с/н из арочки, 4 возд. loops. *Далее трехрогий столбик вяжите так: вначале выполните столбик с двумя накидами, затем столбик с накидом из центра предыдущего столбика, вяжите петельку из 9-ти возд. петель, замкните ее связав ст. б/н из вершины последнего столбика и вяжите последний ст. с/н из центра столбика с двумя накидами. Продолжайте - 4 возд. петли, 6 ст. с/н из арочки, петелька из 13 возд. петель, замкните ее ст. б/н из вершины последнего столбика, 6 ст. с/н, 4 возд. петли и повторите от* еще 4 раза. Последний трехрогий элемент вяжется из второй возд. петли подъема 2 ст. с/н, петелька из 4-х возд. петель и столбика с тремя накидами из 5-ой петли подъема (фото 3).
5th row: вяжется последний ряд лепестков, начните с 3-х петель подъема, 9 ст. с/н, закрепительный столбик без накида из арочки 4-х возд петель предыдущего ряда, далее из большей петли (13 возд.петель) вяжите 28 ст. с/2н, ст. б/н, из меньшей петли (9 возд. петель) 18 ст. с/н, ст. б/н, закончите ряд соединительной петлей в последнюю петлю подъема (фото 4).
6-й заключительный ряд: выполняется ажурная обвязка мотива с элементами "пико" - 3 возд. петли, соединенные в шишечку соединительным столбиком в первую петлю. Вы можете выполнять соединение мотивов в этом ряду, сцепляя мотивы на вершинах "пико", для этого выполнив одну возд петлю, делайте соединительный столбик из шишечки "пико" другого мотива, 1 возд. петля и соединительный столбик в первую возд. петлю (фото 5, 6, 7).

- Новогодний мотив
Красивая новогодняя снежинка в многогранном мотиве может стать частью большого изделия, или быть отдельным праздничным украшением - елочной игрушкой. Этот плотный мотив определенно способен придать праздничную атмосферу.

Схема вязания:

Working process:
Начинается вязание мотива с белой нитки.
Вязать цепочку из 5 ВП, замкнуть ее в кольцо (фото 1).
Обвязать СБН, делая прибавления. Затем вязать 6 раз по 3 тройных пико (фото 2).

Начиная с четвертого ряда, каждый четный ряд вязать красной нитью, каждый нечетный - белой.

Край каждого мотива обвязать СБН зеленой нитью.
Ажурные узоры
Ажурные мотивы крючком вяжутся разными способами, в зависимости от изделий, для которых они подбираются. Их формы могут варьироваться. Они могут быть сложными и многоструктурными, а могут быть незатейливыми и простенькими. Попробуем разобраться в вязании некоторых из них.
- Ажурный квадрат
Интересный ажурный квадрат с цветочным мотивом выглядит элегантно и нежно, а применить его можно для вязания крючком самых разных изделий.

Схема вязания мотива:

Working process:
Вязание мотива начинают от центра. Делают начальное кольцо из цепочки из 5-и воздушных петель или скользящую петлю. Этот квадрат красиво выглядит в двух цветах: 1-5 ряды вяжут одним цветом, 6 - 8 другим.
1 row: 3 воздушные петли подъема, 15 столбиков с 1-им накидом в начальное кольцо;
2 row: 3 воздушные петли подъема, * 1 воздушная петля, 1 столбик с 1-им накидом в петлю столбика предыдущего ряда * - повторить 15 раз, 1 воздушная петля, замкнуть ряд соединительным столбиком;
3 row: 3 воздушные петли подъема, * 2 столбика с 1-им накидом в воздушную петлю предыдущего ряда, 1 столбик с 1-им накидом в петлю столбика предыдущего ряда * - повторить 15 раз, 2 столбика с 1-им накидом в воздушную петлю предыдущего ряда, замкнуть ряд соединительным столбиком;
4 ряд: 1 воздушная петля подъема, * 10 воздушных петель, пропустить 2 столбика предыдущего ряда и вязать столбик без накида в петлю следующего столбика, 3 воздушные петли, пропустить 2 столбика предыдущего ряда, столбик без накида в петлю следующего столбика, 5 воздушных петель, пропустить 2 столбика предыдущего ряда, столбик без накида в петлю следующего столбика, 3 воздушные петли пропустить 2 столбика предыдущего ряда, столбик без накида в петлю следующего столбика * - повторить 4 раза, последний раз вместо столбика без накида вязать соединительный столбик в воздушную петлю подъема (замкнуть ряд);
5 ряд: 3 воздушные петли подъема, 4 столбика с 1-им накидом в арку из 10-и воздушных петель, 3 воздушные петли, 5 столбиков с 1-им накидом в ту же арку, * 1 столбик без накида в арку из 3-х воздушных петель, 7 столбиков с 1-им накидом в арку из 5-и воздушных петель, 1 столбик без накида в арку из 3-х воздушных петель, 5 столбиков с 1-им накидом в арку из 10-и воздушных петель, 3 воздушные петли, 5 столбиков с 1-им накидом в ту же арку * - повторить 3 раза, 1 столбик без накида в арку из 3-х воздушных петель, 7 столбиков с 1-им накидом в арку из 5-и воздушных петель, 1 столбик без накида в арку из 3-х воздушных петель, замкнуть ряд соединительным столбиком;
6 ряд (сменить цвет): 3 воздушные петли подъема, * 5 воздушных петель, 1 столбик без накида в арку из 3-х воздушных петель предыдущего ряда, 3 воздушные петли, 1 столбик без накида в ту же арку, 5 воздушных петель, 1 столбик с 1-им накидом в петлю столбика без накида предыдущего ряда, 3 воздушные петли, 1 столбик без накида в петлю центрального из 7-ми столбиков предыдущего ряда, 3 воздушные петли, 1 столбик с 1-им накидом в петлю столбика без накида предыдущего ряда * - повторить 4 раза, последний раз вместо столбика с 1-им накидом вязать соединительный столбик в воздушную петлю подъема (замкнуть ряд);
7 ряд: 3 воздушные петли подъема, 4 столбика с 1-им накидом в арку из 5-и воздушных петель предыдущего ряда, * 3 столбика с 1-им накидом в арку из 3-х воздушных петель в углу квадрата, 3 воздушные петли, 3 столбика с 1-им накидом в ту же арку, 5 столбиков с 1-им накидом в арку из 5-и воздушных петель, 3 столбика с накидом в арку из 3-х воздушных петель, 3 столбика с накидом в следующую арку из 3-х воздушных петель, 5 столбиков с 1-им накидом в арку из 5-и воздушных петель * - повторить 3 раза, 3 столбика с 1-им накидом в арку из 3-х воздушных петель в углу квадрата, 3 воздушные петли, 3 столбика с 1-им накидом в ту же арку, 5 столбиков с 1-им накидом в арку из 5-и воздушных петель, 3 столбика с накидом в арку из 3-х воздушных петель, 3 столбика с накидом в следующую арку из 3-х воздушных петель, замкнуть ряд соединительным столбиком;
8 ряд: обвязать квадрат стобиками без накида в каждую петлю предыдущего ряда, замкнуть ряд соединительным столбиком.
- Солнечный цветок
Красивый ажурный мотив круглой формы из 11 кругов, который отлично впишется в скатерть или летнее платьице связанное крючком. Очень эффектно смотрится именно при использовании нитей контрастных цветов. В данном случае используется непривычная техника вязания пышным столбиком.

Working process:
1 круг: выполнить 5 возд.п., соед. Art. соединить петли в кольцо и вязать 23 ст. с/н в это кольцо, при этом в начале круга набрать 3 возд.п. подъема, в конце круга выполнить соед. Art. в 3-ю возд.п. подъема (фото 1).
2 круг: повернуть вязание и ввести крючок в кольцо из 3-х возд.п., вязать соед. ст., повернуть вязание и выполнить 4 возд.п., *выполнить 1 вогнутый столбик с накидом за след. Art. с/н, 1 возд.п., повторять от * по кругу еще 22 раза, соед. Art. в 3-ю возд.п. начала круга (фото 2,3).
3 круг: повернуть вязание и ввести крючок под 4 возд.п., выполнить соед. ст., повернуть вязание и сделать 5 возд.п., *вязать 1 вогнутый ст. с/н за петлю нижнего круга, 2 возд.п., повторить от * по кругу еще 22 раза, соед. Art. в 3-ю возд.п. (фото 4).
4 круг: повторить 3 круг (фото 5).
5 круг: 1 возд.п., вязать 3 ст. б/н в каждую цепочку из 2-х возд.п. по кругу, соед. Art. в возд.п. в конце круга.
6 круг: 1 возд.п., вязать по 1 ст. б/н в каждую петлю по кругу, соед. Art. в возд.п. в конце круга (фото 6).

7 круг: 1 возд.п., *выполнить по 1 ст. б/н в след. 2 tbsp. б/н, сделать накид на крючок и ввести его за вогнутым столбиком 4-го круга, на фото показано как это можно сделать проще (фото 1).
Вытянуть рабочую нить (фото 2).
Повторить этот шаг еще 5 раз (фото 3).
Снова сделать накид на крючок и протянуть его через 12 петель на крючке, сделать накид и протянуть его через все петли на крючке (фото 4).
Пропустить след. петлю круга. Повторить от * еще 22 раза, далее выполнить по 1 ст. б/н в след. 2 tbsp. б/н, потом пышный столбик на 3-х возд.п. подъема, соед. Art. в первую возд.п. круга (фото 5).
8 круг: 1 возд.п., *вязать по 1 ст. б/н в след. 2 tbsp. б/н, 3 возд.п., пропустить пышный столбик, повторить от * еще 22 раза, по 1 ст. б/н в след. 2 tbsp. б/н, 1 возд.п., 1 ст. с/н в первую возд.п. круга (фото 6).

9 круг: 1 возд.п. and 1 tbsp. б/н между ст. б/н и возд.п., *5 возд.п., 1 ст. б/н в арку из 3-х возд.п., повторить от * еще 22 раза, 2 возд.п., 1 ст. с/н в первую возд.п. круга (фото 1).