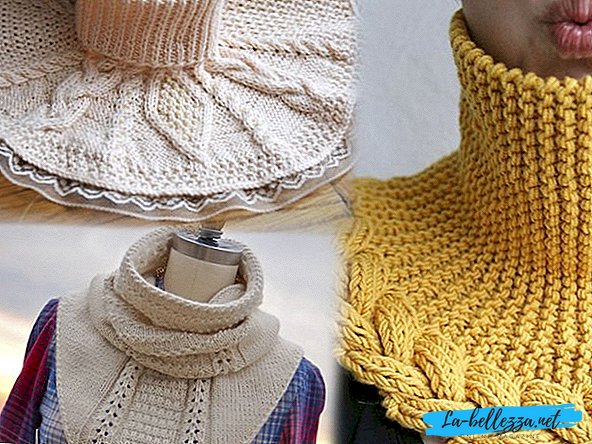
Another kind of small, but useful product that you can create with your own hands is the dickey. The neck is connected with knitting needles and covering the décolleté area and today is quite a popular thing, because it is often often used in everyday life during the cold season. This product made of warm yarn perfectly protects the throat from snow, wind and frost, and saves many people from diseases.
Schemes and description of knitting
In addition to its obvious benefits, the shirt-front can also be very beautiful, and they have a huge variety of varieties: for children, for men, for women, with fasteners, button-down, knitted with elastic, raglan, with a yoke, with openwork patterns and strict classical.
Consider at once several possible variants of knitting dibs with diagrams and descriptions that will suit both novice needlewomen and experienced knitters. But first, consider how to fit a simple dickey spokes - The scheme and description for beginners will help in this.
Step-by-step instructions for beginners

Before you begin to knit a warm collar, beginners need to familiarize themselves with several important rules:
- Knitted shirtfront should consist of dense canvasto keep the original shape as long as possible;
- The needles in this case is better to pick half the size thinner yarn itself, and the yarn should be made from natural compound with a small amount of synthetic impurities;
- Choosing shirtless without buttons and fasteners, remember that the thing fit starting with the neck;
- Calculate the number of needed loops for the shirt You can: measure the neck circumference; measure the density of the canvas; add to the amount of two centimeters. Thus, the knitting product will be free to adhere to the neck;
- Sometimes the edges of the shirtfront are treated crochet so that they do not wrap, using double crochets.
And now you can take a closer look at how to knit the shirtfront with knitting needles - step-by-step instructions will help with this. Take, for example, a simple model of the shirtfront for a woman who fits in raglan.

Instruments:
- wool and acrylic yarn;
- circular needles at number 4,5;
- centimeter.
Working process:
First, we knit a sample of the product with a simple rubber band; we assemble twenty loops, of which fifteen strips are knitted. After that, the volume of the head is measured and further calculations are carried out. After that, the workpiece is stretched horizontally.
In order for the neck to be freely put on and removed without deforming, the classic version provides for stretching the shirtfront by 50 cm. Thus, the number of loops should be around 60 pieces. Knitting raglan involves the number of loops multiple of four, so we add eight more loops. Regulated loops are better marked with markers., bright threads or pins according to this scheme:

On the spokes 68 loops are gathered and the pattern is knitted with a simple rubber band to the height you need (about 15 cm). After that, you can go to the expanding part of the shirtfront.
For the first row you need to tie two loops in the wrong way, and ten things face up. Continue in this sequence to knit until the end of this circle.
For the next row, before the wrong side, make one nakid, then go two ws. loops, thread again, and then knit 10 faces. n. Repeat such manipulations to the very end of the strip.
The third line begins with a nakida, which is knitted with a front eyelet behind the back wall. You need to knit with needles so that holes do not form during work.
Further, the product should consist of such rapports, which are described in the schemes: persons. from a rammer, which was in the previous lane, then two inside-backs, again a nakid, which is performed by a person and 10 persons. n. Repeat this until the very end. As a result, you should have in this series 2 life. n. and 12 persons. P.
After that, repeat the second and third row until the product reaches the desired length (about 20 cm). At the very end, all the remaining loops are closed in a circle with a crochet hook (you can see how to trim the edges of the crochet here), and thread refuels. Dickey is ready. In more detail the knitting process is shown in the video at the end of the article.

Simple model for a child
Of course, the shirt-front can be not only for adults, but also for children. Moreover, warm collar knit knitting, even for the smallest. Children's shirtfront is easy to use and the lack of a high neck. A simple dickey line knits knit with soft yarn, which will not irritate the delicate skin of the baby. Let us consider in more detail how to tie the shirt-front with needles for a child - in this case for a child under one year old.

The size:3 (6) 8 months.
Instruments:
- yarn (100% sheep wool; 100 m / 50 g) - 50 g pale pink;
- needles number 4;
- 3 (3) 4 pearl buttons.
Patterns for children's dummy
Shawl:facial and purl rows knit facial.
Picot rim on 4 loops:
1st and 2nd p .: knit garter stitch;
3rd p .: 2 p. Knit together the front, 1 nakid, from the next 2 loops knit 2 p.
4th R.: 1 p. To remove, as a face, 1 persons. and stretch through it the removed loop, 1 faces. and stretch the 1st loop through the 2nd, 1 person.
1-4th rows are constantly repeated.
Tracery pattern
1st p. (= izn. r.): * 2 p. knit together the front, 1 nakid *. From * to * constantly repeat, finish 1 face.
2nd p. (= Pers. p.): all the loops and nakida knit facial.
Knitting density
21 p. X 42 p. = 10 x 10 cm, connected by a garter stitch.
Working process
Dial on the spokes 16 (22) 30 p. And knit as follows: 4 p. Border with picot, attach a marker, 11 (17) 25 p. Garter stitch, edging.
After 2 cm from the initial row between the edge and the marker tie 2 p. openwork pattern.
Then again continue to knit garter stitch, but shortened rows as follows: * tie 6 (10) 16 n. After the marker, rotate, knit all the loops, rotate, tie 10 (14) 20 n. After the marker, rotate, knit all the loops, turn 2 p. knit all the loops, tie 10 (14) 20 points after the marker, turn, knit all the loops, turn, 2 p. knit all the loops *. From * to * (= 10 p.) Constantly repeat and at the same time every 5 cm repeat the openwork pattern (measured in the narrowest place).
After 17 (22) 22 cm from the initial row (in the narrowest place) after the openwork pattern, tie 2 cm with a garter stitch (without shortened rows), with 2 p. uniformly make 3 (3) 4 holes for buttons - 2 items. knit together the front one, 1 nakid. All loops close.
Assembly
Manish slightly moisten, stretch and allow to dry. Sew buttons.
Universal knitwear for children
Beautiful knit front knitting needles - it's easier than it seems, you just need to use the simple way of knitting the neck, which will look great on both the boy and the girl. Dickey for children knits knit quickly and easily, one has only to use the correct instructions.

Instruments:
- a skein of 100 g;
- circular needles number 3 (you can start on the toe spokes, and then go to the circular).
Working process:
We collect 92 loops on the spokes and knit in a circle 48-50 rows with an elastic band 1 * 1 or 2 * 2. Next, divide all the loops by 4 (mark these places with either markers or threads of a contrasting color) here we will make extensions, and we will have 4 wedges. It turns out on 23 loops.
Now we knit like this: (repeat from * to *)
1 row - * from 1l we knit 2 persons., 19 persons, from 1 persons we knit 2 persons, 1 persons, 1 life *
2 row and all even (up to 32 rows) - facial knit with facial, purl knit with purl, we do not add attachments.
3 row - - * out of 1 persons we knit 2 persons., 21 persons, out of 1 persons we knit 2 persons, 1 persons, 1 wear *
5 row - * out of 1 persons we knit 2 persons., 23 persons, out of 1 persons we knit 2 persons, 1 persons, 1 life *
7 row- * out of 1 persons we knit 2 persons., 25 persons, out of 1 persons we knit 2 persons, 1 persons, 1 life *
9 row - * out of 1 persons we knit 2 persons., 27 persons, out of 1 persons we knit 2 persons, 1 persons, 1 life *
11 row- * of 1 persons we bind 2 persons., 29 persons, of 1 persons we bind 2 persons, 1 persons, 1 wear *
13 row - * out of 1 persons we knit 2 persons., 31 persons, out of 1 persons we knit 2 persons, 1 persons, 1 life *
15 row - * of 1 persons we bind 2 persons., 33 persons, of 1 persons we bind 2 persons, 1 persons, 1 wear *
17 row- * out of 1 persons we knit 2 persons., 35 persons, out of 1 persons we knit 2 persons, 1 persons, 1 life *
19 row- * out of 1 persons we knit 2 persons., 37 persons, out of 1 persons we knit 2 persons, 1 persons, 1 life *
21 row- * of 1 persons we bind 2 persons., 39 persons, of 1 persons we bind 2 persons, 1 persons, 1 life *
23 row- * out of 1 persons we knit 2 persons., 41 persons, out of 1 persons we knit 2 persons, 1 persons, 1 life *
25 row- * out of 1 persons we knit 2 persons., 43 persons, out of 1 persons we knit 2 persons, 1 persons, 1 life *
27 row- * out of 1 persons we knit 2 persons., 45 persons, out of 1 persons we knit 2 persons, 1 persons, 1 life *
29 row - * of 1 persons we bind 2 persons., 47 persons, of 1 persons we bind 2 persons, 1 persons, 1 life *
31 row - * out of 1 persons we knit 2 persons., 49 persons, out of 1 persons we knit 2 persons, 1 persons, 1 life *
32 row- * 1 persons, 52 out, 1 persons, 1 out *
33 row - * out of 1 l bind 2 persons., 51 persons, out of 1 persons we bind 2 persons, 1 persons, 1 wear *
34 row - * 1 persons, 54 out, 1 person, 1 out *
35 row - * out of 1 persons we knit 2 persons., 53 persons, out of 1 persons we knit 2 persons, 1 persons, 1 life *
36 row - * 1 persons, 56 out, 1 persons, 1 out *
37 row- close all loops. Dickey is ready.

Knitting openwork shirtfront for girls
In the cold season there are no more beautiful things than knitted warming products. Not all kiddies like scarves, so dummies come to the rescue. It is the shirt-front spokes for the girl can be a real decoration: patterns, braids, voluminous floral motifs - the scope for endless creative fantasy. Knitting the needleshank with knitting needles will be one pleasure for a needlewoman, if you pick up an interesting pattern for knitting an openwork item.

Instruments:
For large size
- yarn (70% acrylic. 30% angora, 300 meters per 100 grams) - 1 skein;
- bilateral needles number 1.5;
- bilateral and circular needles No. 2;
- hook number 2.
For small size
- yarn (75% acrylic, 25% wool, 130 meters per 50 grams) - 2-3 skeins;
- bilateral needles №2,5;
- bilateral and circular spirits №3,5,
- hook number 3.5.
Broach: perform it removing the loop, 1 l. p., we throw the shot on the knit = 2 p. vm. l behind the back wall.
2 n. Instead of facial: we get the right sp. in the second eyelet, and then - in the first on the left ch., 2 n. vm. l., we throw the removed loop on the already knitted one.
Double subtraction:remove the loop, 2 p. vm. l., we throw the removed loop on the already knitted one.
Pattern knitting openwork shirtfront knitting

Working process:
Bind smaller knitting needles to connect the number of p., A multiple of 4 - in our case, 90, distribute them evenly on 4 sp. and connect in a circle. Then we knit the gum pattern in a circle 2 x 2 about 14 cm, change cn. for a larger size.
Now we should knit one row l. p., at the same time adding loops in this row to get a total of 105 p ...
- We continue knitting according to the scheme, when it becomes inconvenient to work with these sp., We change them to circular ones:
1 p.:* broach, 2 liters. Clause 2 Clause vm l., nakid, 1 l. n. for the rear walls., nakid, broach, 2 liters. Clause 2 Clause vm l., nakid, 2 p. vm l., nakid, from *. - 2 p. and all even:l P…
- 3 p.:* broach, 2 liters. n., nakid, 1 l. n., nakid, 1 l. n. for the rear walls., nakid, 1 l. n., nakid, 2 l. Clause 2 Clause vm l., n., double decrease, n., from *.
- 5 p .:* broach, 2 liters. n., nak., 2 l. n., nak., 1 l. n. for the rear walls., nak., 2 l. n., nak., 2 l. Clause 2 Clause vm l., nak., double decrease, nak., from *.
- 7 p.: * decrease to the left, 2 l. n., nak., 3 p. n., nak., 1 l. n. for the rear walls., nak., 3 p. n., n., 2 p. Clause 2 Clause vm l., n., double decrease, n., from *.
- 9 p .: * prot., 2 l. p., n., 4 p. p., n., 1 l. n. for zadn. walls., n., 4 l. n., n., 2 p. Clause 2 Clause vm l., n., double decrease, n., from *.
- 11 p.:* prot., 2 l. the item, n., prot., 7 l. Clause 2 Clause vm l., n., 2 l. Clause 2 Clause vm l., n., dv. ass., n., from *.
- 13 p.: * prot., 2 l. the item, n., prot., 5 l. Clause 2 Clause vm l., n., 2 l. Clause 2 Clause vm l., n., dv. ass., n., from *.
- 15 p.:* prot., 2 l. p., n., pr., 3 p. Clause 2 Clause vm l., n., 2 l. Clause 2 Clause vm l., n., 3 l. n., n., from *.
- 17 p.: * pr, 2 l. p., n., pr., 1 l. Clause 2 Clause vm l., n., 2 l. Clause 2 Clause vm l., n., 1 l. n. for zadn. walls., n., dv. ass., n., 1 l. n. for zadn. walls., n., from *.
- 19 p.: * pr, 2 l. n., n., dv. ass., n., 2 p. Clause 2 Clause vm l., n., 3 l. p., n., 1 l. for h. walls., n., 3 p. n., n., from *.
- 21 p.: * pr., 5 l. Clause 2 Clause vm l., n., 1 l. for h. Art., n., dv. ass., n., 3 p. n., n., dv. ass., n., 1 l. for h. Art., n., from *.
- 23 p.:* pr., 3 p. Clause 2 Clause vm l., n., 3 l. n., n., 2 p. n., n., dv. ass., n., 2 p. p., n., 3 p. n., n., from *.
- 25 p.:* pr., 1 l. Clause 2 Clause vm l., n., 1 l. for h. Art., n., dv. ass., n., 3 p. p., n., 3 p. p., n., 3 p. n., n., dv. ass., n., 1 l. for h. Art., n., from *.
- 27 p.:* two ass., n., 3 p. p., n., 1 l. for h. Art., n., 1 l. p., (n., dv. ub., n., 1 l. p.) x 3, n., 1 l. for h. Art., n., 3 p. n., n., from *.
Close all the loops, without cutting the thread = 1 p., Transfer it to the hook.
Strapping product
* (Column without n., 3 air loops, 1 column) in the first section, skip 0.5-1 cm, repeat from * and end with connecting column. We wrap the collar, if desired, it can also be hemmed. Hiding the ends on the wrong side. In order to decorate the shaped frontline beautifully, it must be carefully steamed.

Description of knitting model for a boy
If everything is clear with the girls - flowers and braids, then the dimples for boys fit in a more strict, classical way. In this question, the following scheme and description of the knit front for the boy with knitting needles will be useful.

Progress with step by step photos
On a head volume of 50 cm by 4 needles, evenly distribute 60 loops. Next, knit gum pattern (alternating 1 face and 1 purl) 17 rows.

At will it is possible to connect a neck and more authentic. 17 next to we finish knitting gum, 18 rows will go only the front surface.

From the 19th row we begin to count raglan - these are 4 lines that go from the neck to the armpits. A regular line can be one loop, two or a pigtail. In this master class, it consists of 4 loops (60-4 = 56). We divide these 56 loops on the back and in front (17 loops each), and on the sleeves (11 loops each). Then knit according to this scheme:
- in front of 17 loops by the front satin stitch and denoted by another thread raglan loop;
- 11 sleeve loops and mark the raglan loop;
- 17 loops before the front surface, raglan loop;
- 11 loops of the other sleeve.
The result was the 19th row (photo 1).
In the 20th row we knit 17 loops before, add a loop from the broach. Next, knit the front raglan loop and also add a loop from the broach. We continue 11 loops of the sleeves, add one loop, knit one face, add a loop. 17 loops of a back, gain, 1 front, gain. 11 loops of the second sleeve, we add a loop, we knit 1 front, and once again we add a loop. Thus, we will expand the shirtfront.
Starting with 21 rows and in all odd rows, we knit without changes.
With 22 rows, including all even rows, we do raglannye additions. We knit until the sleeve length is 6 cm. As a result, 36 knit rows are obtained.
In the 37th row we knit the loops of the front of the back and raglan with the front satin stitch, and the loops of the sleeves are knitted with the wrong side.
In the 38th row, we close the sleeves with face loops (photo 2).

Next, we continue to knit only in front and then back. To do this, in the 39th row we knit the first 2 and the last 2 loops with the back, and the middle ones - with the face loops.
In the 40th row we knit everything according to the pattern.
In the 41st row we make two loops together with a purl, one purl, the middle loops are knitted with a front satin stitch, 1 purl, 2 loops with a purl.
In the 42 row we knit according to the picture. So knit up to 56 rows, our front will gradually taper.
With 56 rows, we reduce not only on the front side, but also on the wrong side too.
In the 60 row, the needles will remain 10 loops. We knit two loops together on faces, we knit 6 facial, two loops of faces.
In the 61st row (on the wrong side) we close all the loops with facial ones.
Similarly, the front knit and back. You can adjust the length of the front and back.
We tie a ready-to-play shirt with crocheted crochet stitches and a striking step. Dickey for a boy ready.
How to tie a beautiful model for a woman

This unusual dickey for a woman is very useful in the offseason, when it is not too cool, and you only need to cover your shoulders. This is rather a decorative knitted thing, rather than clothing that saves you from the cold, but such a model looks very impressive on women and girls. Let's take a closer look at how to knit the shirtfront with beautiful bulky braids.
Instruments:
- yarn (100% wool, 94 meters per 100 grams) - 5-6 hanks;
- Knitting needles 11 mm, length - 60 cm.
Description proposed for two sizes: S / M (L / XL).
Knitting patterns:
Spit tilted to the right: sn. 3 p. To add. cn for braid for canvas, 3 liters. p., then 34 l. n. with add. cn ...
Spit tilted to the left: sn. 3 p. To add. cn for braids in front of the canvas, 3 liters. p., then 3 p. n. with add. cn ...
Broach: sn. as l., 1 l. p., throws the filmed p. on the knit.
Working process
Bottom part
We collect 31 p., Then follow the description below.
1 p. and all odd pp.knit according to the scheme: 4 and. p. 2 l. n., 6 and. p. 1 l. n., 1 and. for h. Art., 1 l. n., 6 and. p. 2 l. n., 2 and. p. 2 l. n., 4 and. P…
2, 4, 8 pp.(LS): 4 l. n., 2 and. Clause 2 Clause vm l., n., 2 and. p. 6 l. n., 1 and. p. 1 l. for h. Art., 1 and. p. 6 l. n., 2 and. p. 4 l. P…
6 p.: 4 l. n., 2 and. Clause 2 Clause vm l., n., 2 and. n., spit with a slope to the right, 1 and. p. 1 l. for h. st ... 1 and. n., spit with a slope to the left, 2 and. p. 4 l. P…
Alternate 1-8 pp. to achieve the length of the workpiece 120 (140) cm, close all the items and sew.
Top part
From the front side along the sidewall we uniformly type 133 (152) p., Now you need to knit in a circle without turns.
- 1 p.: l P…
- 2 p .:* 1 and. p. 6 l. n., 1 and. p., n., 4 p. Clause 3 Clause vm l., 4 l. n., n., from *.
- 3 and all odd pp. bind according to the scheme: l. n., knit knit as. P…
- 4 p.: * 1 and. p. 6 l. n., 1 and. p. 1 l. p., n., 3 p. Clause 3 Clause vm l., 3 l. p., n., 1 l. sweat *.
- 6 p.:* 1 and. n., spit with a slope to the left, 1 and. p. 2 l. n., n., 2 p. Clause 3 Clause vm l., 2 l. n., n., 2 p. sweat *.
- 8 p.: * 1 and. p. 6 l. n., 1 and. p. 3 l. p., n., 1 l. Clause 3 Clause vm l., 1 l. p., n., 3 p. sweat *.
- 10 p.:* 1 and. p. 6 l. n., 1 and. p. 4 l. n., n., 3 p. vm. l., n., 4 l. sweat *.
- 12 p.: * 1 and. p. 6 l. n., 1 and. n., n., 2 p. Sec., etc., 3 p. vm. l., 2 p. vm l., 2 l. p., n., from * = 119 (136) p ...
- 14 p.: * 1 and. n., spit with nakl. ow. 1 and. p. 1 l. n., n., 2 p. Clause 3 Clause vm l., 2 l. p., n., 1 l. sweat *.
- 16 p.: * 1 and. p. 6 l. n., 1 and. p. 2 l. p., n., 1 l. Clause 3 Clause vm l., 1 l. n., n., 2 p. sweat *.
- 18 p.: * 1 and. p. 6 l. n., 1 and. p. 3 l. n., n., 3 p. vm. l., n., 3 l. sweat *.
- 20 p.:* 1 and. p. 6 l. n., 1 and. p., n., 1 l. Sec., etc., 3 p. vm. l., 2 p. vm l., 1 l. p., n., from * = 105 (120) p ...
- 22 p.:* 1 and. n., spit with nakl. ow. 1 and. p. 1 l. p., n., 1 l. Clause 3 Clause vm l., 1 l. p., n., 1 l. sweat *.
- 24 p.: * 1 and. p. 6 l. n., 1 and. p. 2 l. n., n., 3 p. vm. l., n., 2 l. sweat *.
- 26 p.:* 1 and. p. 6 l. n., 1 and. Sec., etc., 3 p. vm. l., 2 p. vm l., from * = 91 (104) n ...
- 27 p.:knit like unpaired pp ...
Then you need to knit 1 p. l p., diminish 13 (20) p. along it = 78 (84) p ...
Tie another row: * 3 liters. n., 3 and. sweat *.
Another 2 p. узор резинка 3х3.
Следующий рядок: вяжем 36 п. узор резинка, поворачиваем и теперь продолжаем вязание туда и обратно, не по кругу.
Добавляем 3 п. в начале рядочка и заканчиваем резинкой 3х3. Продолжаем вязать узор резинка 3х3 еще 18 см, закрываем п. и пришиваем набранные 3 п. к горловине с изнанки. Манишку перед ноской следует отпарить.
Манишка для мужчины

Манишки прекрасно смотрятся и на мужчинах. А будучи заботливой супругой или девушкой, мамой или сестрой, обязательно стоит связать это несложное изделие спицами, которое будет беречь горло и шею дорогого мужчины холодной зимой.
Итак, рассмотрим несложный вариант того, как вязать манишку для мужчины - мастер класс в этом поможет. Эта модель вяжется двумя отдельными частями, после чего сшивается. Поэтому этот вариант прекрасно подойдет для вязальщиц с небольшим опытом. Расчеты этого изделия идеально подойдут на размер 50-52.
Инструменты:
- пряжа черного цвета Unity Light (48% шерсть, 52% акрил, 200 метров на 100 грамм) - 1 моток;
- пряжа для декора полосами светло-серого цвета Unity Light (48% шерсть, 52% акрил, 200 м на 100 грамм) - около 30 грамм;
- пять круговых спиц №4.
Ход работы
Начинаем вязать спицами с горловины изделия: используем 2 круговые сп., набираем 88 петель (вы можете изменять количество петелек, но их число должно быть кратно четырем).
Вынимаем одну из сп. и вяжем ею 28 п. резинкой 2х2, отпускаем эту сп. и берем еще одну, ею также вывязываем "резинкой" 28 п., опускаем, третьей круговой сп. мы вяжем оставшиеся 32 петельки все той же резинкой.
Соединяем все петельки в круг, далее нам нужно связать 36 рядочков резинкой 2х2. Горловина готова.

Теперь переходим на лицевую гладь. Переносим наше полотно на 4 сп., вместо трех. Выполняем прибавки.
Первая сп: 1 л. п., 1 приб. из прот., связать 20 л. п., 1 приб. из прот., 1 л. п…
Вторая, третья и четвертая - так же.
Мы провязали спицами 88 п. горловины и прибавили 8 дополнительных п… Нам нужно вязать таким образом еще 13 рядков черной нитью лицевой гладью, добавляя в каждом втором рядку по 8 петелек, как описано ранее.
Далее, как было выше сказано, первый рядок: 1 л. п., 1 приб. из прот., связать 20 л. п., 1 приб. из прот., 1 л. п., второй - только л. п… Чередуем 1-2 рр., если Вы все делаете правильно, то в каждом новом рядке будет на 2 петельки больше, чем в предыдущем.
Меняем нить на светло-серую и продолжаем вязание спицами: 3 рядка, делая прибавки через ряд по 8 п. (1-й р. без прибавок, второй - с, третий - снова без). На каждой сп. мы получаем по 38 п.
После третьего провязанного рядочка делим работу на две части, их мы будем доделывать порознь.
Меняем нить на черную и закрываем 5 пет. с первой кр. сп., затем делаем 1 л. п. (на сп. будет она + 1 кром. п., после закрытия п.) и делаем убавку влево.
Теперь надо связать 28 л. п. с первой кр. сп., прибавка из прот. по рисунку, довязываем 1 л. п. с первой кр. сп… Этой же сп. вывязываем п. со второй сп.: 1 л. п., 1 приб. из пр., 28 п. лиц., 2 п. вм. вправо, 1 лиц. п., 1 кром. п… Оставшиеся 5 п. скидываем на 3-ю сп. - мы провяжем их позже, ровно как и п. на 3 и 4 кр. сп…
На основной сп. у нас 66 п., вязать их мы будем 2-мя сп… Чтобы сохранить наклон полос, в каждом 2-м р. мы будем делать прибавки из протяжек в центр. части. Чтобы манишка чуть-чуть сузилась внизу, в каждом р. мы будем делать убавки. Второй рядок вяжем спицами таким образом: 1 кр. п., 1 и. п., 2 и. п. с накл. вл., 58 и. п., 2 и. п. с накл. впр., 1 и. п., 1 кр. п… По такому же принципу нам нужно связать все изнан. рр., Мы будем менять кол-во только средних и. п., уменьшая их каждый раз на 2.
3-й р. (лицевой): 1 кр. п., 1 л. п., 2 л. п. с накл. влево, 27 л. п., 1 п. из протяжки, 2 л. п., 1 п. из протяжки, 27 л. п., 2 л. п. с накл. впр., 1 л. п., 1 кр. п… Так же мы будем вязать и все остальные л. р., меняя только число средних л. п. до и после разделительной полосы, каждый раз уменьшаясь на 1 п…
Не забываем каждые 3 р. менять цвет нити. У нас получилось 4 серых полосы, но Вы можете и удлинить изделие.
После посл. серой полосы вяжем 10 р. платочной вязкой черной нитью, выполняя всю схему прибавок и убавок.
Заднюю часть делаем по аналогии с передней, только в первом р. закрываем не 5 п., а 10. Посл. 5 п. мы тоже закрываем отдельным кусочком нити, чтоб не обрывать основную.
Видео урок
Не всегда легко с первого раза сориентироваться в схемах и описаниях вязания спицами новых для себя вещей, даже если с первого взгляда все кажется простым. Чтобы процесс был быстрее и понятнее, можно посмотреть несколько видео-уроков, которые уберегут от возможных ошибок новичка и наглядно обучат некоторых хитростям ремесла.
Видео “Как связать манишку спицами”
//www.youtube.com/watch?time_continue=601&v=rdf8MlwcKEI