Many women pay great attention to the appearance of their nails. Well-groomed, neatly painted nails - it is beautiful and pleasing to the eye. Services in salons and at home from masters are not cheap, so more and more girls and women tend to learn how to do manicure itself. The process not only saves savings, but also brings pleasure. In order for your skill to be close to the skill of professionals, you need to train more and follow some rules.
How to make a classic manicure itself?
There are two types of manicure: classic and European. A classic is considered a cut manicure, involving the cutting of the cuticle. European or "unedged" became popular relatively recently. This style came from Europe and North America. It is safer in execution because it does not require cutting the cuticle.
But the classics always remain classics. In the stages of applicationmanicure cut enters:
- Creating a nail shape;
- Hand bath;
- Getting rid of the cuticle.
These are the basic steps, each of which has its own nuances for implementation.
Required Tools

To achieve the beauty of fingernails at home, you must use special instruments:
- Nail polish remover;
- Cotton pads or lint-free wipes;
- Nail scissors / nippers;
- Pusher or orange stick to remove the cuticle;
- Remuver (cuticle remover) or bath;
- Nail file for shaping nails;
- Nail file for polishing;
- Base plate coating;
- Hand cream.
Once you have collected all the necessary set, you can begin to prepare the surface of the nail for applying varnish.
Nail polish remover

If you have old lacquer on your nails, then, accordingly, you need to get rid of it so that the new color does not mix with the previous one and looks beautiful.
A clean plate also does not hurt to wipe the liquid from the removal of varnish. This simple action will help to degrease the surface of the nail. It is better to do this with a lint-free napkin; it, unlike cotton pads, does not leave villus.
Trimming and filing nails

The next stage is shaping your nails. Argued that you can not cut your nails - just file off. However, this action is not essential, since it does not cause harm to the natural plate.
If your edge is too long, trim it to the desired length with scissors or nippers. After trimming the file comes into play. File should be at an angle of 90 °, otherwise the nails will exfoliate.
Would you like to create a square or rounded shape, the movement should be smooth, especially when working with the side. Otherwise, there is a possibility of nail ingrowth.
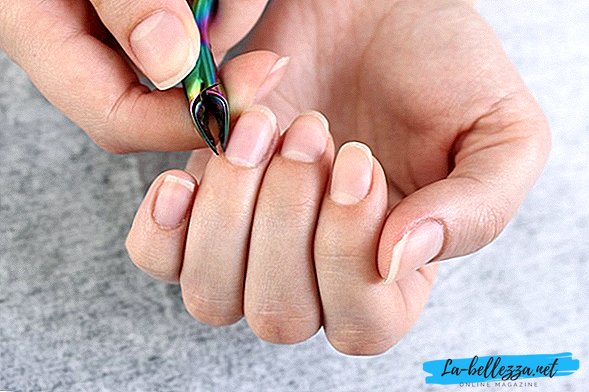
Cuticle removal

Before proceeding further and to get rid of from malicious cuticle, it is first necessary to soften.
Before starting the procedure, treat the instruments with an antiseptic in order not to accidentally put an infection under the skin.
In a bowl with warm water, add sea salt or essential oil, dip your fingers in water for 5 minutes. Instead of the bath, you can use a special tool - remuver, the result will be the same. After the cuticle has softened, gently pick it up with pusher. Strongly do not press on the area of the hole, so you can damage the nail plate. Carefully cut off the cuticle with thin nail scissors. In order to avoid further delamination, lightly polish the surface of the plate with a polishing file.
A good addition would be the cuticle oil. Upon completion of the procedure, apply it with massage movements to the skin near the nail and the cuticle itself. It nourishes the treated surface with essential vitamins and relieves irritation.
Applying varnish

Now we proceed to the most interesting - polishing. Before painting the nail, degrease it again with a special polish or nail polish remover. It will also remove remuver remnants.
Before taking a color varnish, apply a transparent varnish on a nail plate. It will serve as the basis for further action. When the varnish dries, open the jar with the desired color.
Apply the first smear in the center, retreating slightly from the cuticle. And only then fill in the remaining edges. This classic manicure is completed.
How to do unedged manicure at home?

Unedged manicure - one of the main current trends. Significant advantage of this technique is its safety. The main principle: do not cut the cuticle, but simply "push" to the base. Thus, its structure remains soft and supple.
The cuticle protects the nail from infection, while maintaining it, this function remains. The more often cut off the skin, the rougher it becomes and spoils the manicure, because the cuticle grows very quickly. Also at the same time the nail plate deteriorates.
Do unedged manicure at home Simply, you need to follow the tips:
- If you have always done a classic manicure before, but decided to switch to the European version, then after each shower, move the skin back to the base of the nail. When the cuticle grows, remove it with scrubbing movements.
- To improve blood flow and soften rough skin, rub your fingers several times a day with cuticle oil.
- Get a hard file. It helps to get rid of burrs and prevent the emergence of new ones.
The main thing in unedged manicure is to observe the daily care of the cuticle. Stick to the basic three rules and painted nails on your hands will look neat and beautiful.
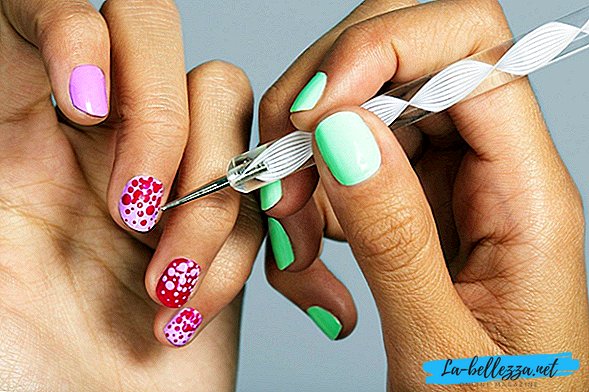
Ideas for home manicure

Professional masters of nail service are not only experienced, they have a rich imagination for the most amazing nail art. Beauty can be concluded in simplicity, and maybe in originality of design.
At home, it is possible to make a manicure no worse, there would be a desire and patience. Experienced manicure to create nail art at home are advised to start with simple designs.
French manicure

French - the easiest and most popular manicure, which is always fresh and neatly looks on the nails. To create it will need: transparent base, lacquer delicate shade, white lacquer and fixer.
Performance technique next:
- Cover the nails with a base;
- Apply colored lacquer, preferably in two layers for contrast with a white stripe, and wait until it dries;
- A thin brush should hold a white stripe along the edge of the nail. To make it smoother, you can use a stencil;
- To hold on the nail plate fixing varnish.
French manicure contains sophistication and elegance, it will look great on a gala evening, and in everyday life.
Moon manicure

Moon manicure is also called "reverse french". The difference between the moon manicure and the French one in the arrangement of the strip is located at the hole, and not along the edge of the nail.
Principle of application varnish is almost the same as in the classic version:
- Apply a base coat;
- The rim of the nail plate to draw a brush;
- Apply a second color to the main part of the nail;
- Cover with fixer.
there is still one option applying lunar nail art:
- Apply a transparent base;
- Cover the hole with a sticker-stencil that can be cut by yourself;
- Varnish nails;
- Then, when the free edge dries out, paint the base of the nail with a thin brush;
- Apply a fixative.
Manicure with holes looks interesting and fresh. Also, to turn the hole into a shining crescent, you can use a shiny lacquer or put glitter on top.
Matte manicure

To create a matte manicure will need a special coating. It can be colored, like ordinary varnish, and colorless, which turns any glossy varnish into a matte finish.
To make a matte manicure, you need:
- To degrease the nails;
- Apply the desired varnish. It can be varied: with shimmer, glitter, metallic or nacre. The texture is unimportant;
- Smoothly spread the varnish on the nail. Matte manicure emphasizes all the irregularities, so the nails should be perfectly polished;
- Secure with a matte finish.
The matte finish brightens the color, but without it the varnish will not last long.
If you do not have a special varnish, but I want to getmatte effect, it is possible to achieve this in another way. To do this, you need to follow the steps:
- Apply the base;
- Put a small pot of water to boil;
- Cover your nails with a thin layer of varnish;
- When the first layer dries, apply a second on two nails;
- While the nails are not dry, bring them to a couple of water. Wait about a minute, periodically changing the angle of the palm;
- When the procedure is complete, apply a fixative.
This technique should be done alternately on each finger, but in the end a matte effect will be achieved.
Water manicure

Water manicure has another name - marble. This nail art is always a unique design that can not be repeated twice. Run at home is easy. For this you will need:
- Narrow container with water;
- Varnish with a liquid consistency (at least two colors);
- Any tape;
- Cuticle oil;
- Cotton swabs and discs;
- Thin wooden stick;
- Nail polish remover;
- Base and nail fixer.
When everything you need is collected, you can proceed to manicure:
- To hold on the nail plate base coat;
- Tape the skin around the nails with adhesive tape;
- Five drops of the first color drip in a container of water. When the color fills the water surface, add the rest of the shades in as many drops;
- Wand draw on the surface of the desired pattern;
- Put your fingers in a colorful film and, after waiting a little, take it out;
- When the varnish is dry, remove the adhesive tape. If the color went to the skin, it can be erased with a nail polish remover;
- Apply fixative.
Water to create water nail art should be at room temperature. In a warm pattern on the surface will be sloppy, and in cold lacquer will quickly harden and roll.
Water manicure can create not only chaotic lines, but also peas. To achieve this effect, we need the following tools:
- Lucky neon flowers (3-4);
- Black and white varnish;
- Spray with a weak stream, suitable deodorant or hair spray;
- Basis and fixer.
Order of creation neon peas:
- Cover the nails with a base, then paint with white lacquer. On white color colored specks will look brighter;
- Take 3-4 colors and distribute them on the plate at your discretion. If one color will go to another or painting will be uneven, then do not worry. This will not affect the result;
- Seal the skin around the nails with scotch tape;
- In a container with barely warm water drip black lacquer so that it spreads along the water surface;
- Any spray (for hair, deodorant, etc.) sprinkle black to make spots of different shapes appear;
- Dip 1-2 fingers with a toothpick to remove excess;
- Remove the tape. If the varnish goes beyond the nail, remove it with nail polish remover;
- Cover your nails with a fixing top.
Another original nail art is ready. Water manicure looks best on medium length nails.
Mirror manicure

Mirror manicure creates the appearance of color transfusions. It looks rich and interesting, but for this you need to purchase:
- Gel polish;
- Gel polish coating;
- UV lamp;
- Wipe (brilliant powder);
- Cosmetic sponge.
Having acquired the necessary tools, you can start applying nail art:
- First of all, cover the nails with a special base and hold it under the UV lamp for about 2 minutes;
- Distribute the main color on the nails and dry under the lamp;
- Be sure to apply a second layer and place again under the UV lamp;
- Cover the nails with a top coat, dry the nails one by one;
- Spongem apply glitter in the middle of the nail plate and spread over the entire surface of the nail;
- Secure top and dry under a UV lamp.
Applying a mirror manicure takes more time than regular polish, but it looks much richer and more effective. The options for nail art are endless, as well as fantasy. Experiment, learn from professionals and create yourself.
How to make the varnish held for a long time?
Every girl and woman tormented herself with a question: how to make the varnish hold on for a long time? And it does not matter whether the manicure was done in the salon or at home. Lacquer tends to crack. This process can be delayed by following some tips:
- Sand the nail plate with a polishing file. Nails should be smooth, so the varnish not only lasts a long time, but also lies more beautiful. But do it carefully so as not to damage the plate.
- If you have thin nails, be engaged in their improvement. On hard nails lacquer lasts longer. Always use the base.
- Degrease the nail cover. Lacquer residues, particles of fat and dust invisible to the eye affect the success of the future of nail art.
- Many in childhood saw how adult women, before applying varnish, beat him on the palm. However, this action is fundamentally wrong. The flask with varnish needs to be twisted in the hands, so the varnish will not mix with air and there will be no bubbles. Also, the bottle should be kept in a dark place.
- Paint your nails in three stages. The first stroke falls on the center, then on the sides.
- Varnish should not be applied more than two layers.
- After applying each layer, let your nails dry for at least 10 minutes.
- Apply vitamin oil to the plate and skin around the nail. It will protect the nail art and strengthen the structure of the nail.
- Do a manicure when all household chores are done. Ideally, in order to dry out completely and not deteriorate from contact with objects, the varnish needs more than 12 hours. But in order to frost and not collect fine dust for an hour.
- Whether it is a simple varnish, shellac or gel varnish, always at the beginning of the creation of a manicure, use the base, and finally apply the fixative.
Never dry your lacquer with a hair dryer, use a UV lamp or wait until the coating dries itself.
By adhering to these simple rules, you save the beauty and health of your nails. Paint the nails as often as possible, and then, with the advent of experience, your manicure cannot be distinguished from the master's works.