In the country I want to relax my soul and body.
Of course, you need to take care of the garden, but this does not prevent you from feeling relaxed from unity with nature.
For a good rest, you need to correctly plan your work and create a cozy atmosphere in the garden.
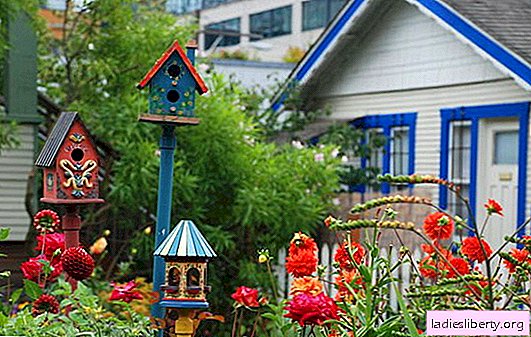
The best DIY craft for the garden will be a do-it-yourself birdhouse.
This is both a decoration and a useful acquisition. Birds will present a good mood, rid of harmful insect pests.
DIY crafts for the garden: birdhouses for different birds
From the name, you might mistakenly think that this handmade DIY craft for the garden is only suitable for starlings. But this is not so. Different birds can live in the birdhouse, which can fit in it. Of course, only their houses are suitable for different birds, so you should immediately consider for whom you are building a birdhouse. More often in the garden you can find sparrows, tits, starlings, wagtails. For each type of bird, the birdhouse has its own parameters.
1. Starlings. Make the bottom square with a side of 13 to 15 cm. Let the birdhouse be 30-40 cm high. For a starling, you need a perch leading to the entrance (the entrance to the birdhouse), because its legs are adapted to cling to tree branches. The thickness of the perch is equal to a centimeter in diameter, and the length is 5-6 cm. Pin the perch with two nails so that it does not rotate around its axis. Attach it a little lower than the notch, retreating 0.5-1 cm. The notch itself should be 4-5 cm in diameter.
2. Tits, Cyanistes, Pied flycatchers and White-necked. The size of the birdhouse is slightly smaller. The side of the square bottom should be from 12 to 14 cm, and the height from 20 to 25 cm. The diameter of the notch is 3-3.5 cm, make it at the very top at a distance of 1-2 cm from the ceiling of the birdhouse. The paws of the tits are very tenacious, because the perch can not be done.
3. Sparrows. In height, the house for the sparrow is 22-25 cm, the side of the square bottom is 12 cm. The entrance diameter is 3-4 cm, it must be done at a distance of 4-5 cm from the ceiling. For a sparrow, you can make a small "porch" 4-5 cm wide and protruding 1-2 cm.
4. Swifts. For them, the house should be low and narrow, but long. In height it is 15 cm, in width - 10 cm, but the length should be 20 cm. Make the entrance not round, but square with a side equal to 5 cm. And you need to do it at the very top and the edge, retreating by 1-2 cm from the ceiling and side wall.
5. Wagtail. Birdhouse looks like a swift house. Height and width - 15 cm, and the length should be 30 cm. The entrance should be rectangular, narrow (3-4 cm), but high (from floor to ceiling). The main thing is that when building a house for a wagtail you need to make a "gangway" or "balcony" to enter the birdhouse. It can be a square plank with a side of 10 cm. Such an entrance is needed because the wagtail is a running bird. Their feet are not designed for climbing trees.

The necessary tools and material for DIY garden birdhouse
The birdhouse should be strong, warm, not leaking and soundproof. Therefore, as a material for DIY garden birdhouse do-it-yourself, only untreated hardwood is suitable. The birdhouse of their coniferous wood will be sticky and with an unpleasant odor. The plywood house does not have the proper heat and sound insulation. The birdhouse from particleboard and fiberboard has an unpleasant odor, and these walls will also release toxic substances. To make a house, it is better to take birch, alder or aspen wood.
To connect the walls of the structure you will need glue, but not to give strength, but to improve the heat and sound insulation of the birdhouse. To connect the walls, thin nails or self-tapping screws are needed, the latter being preferable. The bird house should not have gaps. Therefore, before work, make a drawing and carefully measure all the workpieces. In addition to the above sizes for a birdhouse, keep in mind that its roof should protrude above the notch. Then it will protect the peace of birds from slanting rains.
When collecting DIY crafts for the garden, remember that you sometimes have to clean it. Therefore, the cover must be made removable. The methodology for its manufacture is described below. Now we only note that for this it is better to choose a flat roof, and not a gable roof. Also, a flat roof, unlike the second, does not leak over time. Additionally, the lid can be attached with screws that are easily removed when cleaning the birdhouse.
We collect DIY crafts for the garden
Sawing the walls of the house, make sure that all the DIY-made garden crafts elements are of the right size. The letka is cut out with a mill or drilled, and then enlarged with a rasp. The outer sides of the walls can be sanded, but the inner ones are necessarily left rough. If you made the outer parts of the walls smooth, then be sure to pin a convenient pole. The inner parts of the walls can be chiselled, then it will be more convenient for the birds to climb them.
When fastening DIY parts for garden crafts, carefully ensure that there are no gaps. Pre-glue the parts together, and then fasten them with nails or self-tapping screws. Make sure that their ends do not stick out inside the birdhouse. The roof visor should go far to protect the entrance from rain. Also, if a cat climbs into a birdhouse, then it will not be able to put its paw far inward.
Procedure
1. Cut out the parts, make sure that the dimensions correspond to the drawings. Make a tap hole.

2. Initially, the front wall is connected to the side. Use the nails to center the structure and the edges. Check for structural strength. If it is unsatisfactory, then drive a few more nails between previously hammered.

3. Assemble the structure by nailing the bottom and back wall. Check for structural strength. If it is unsatisfactory, then drive a few more nails between previously hammered.

4. The roof is made of two parts - the roof itself and the sleeve. A sleeve is a plank pinned at the bottom of the roof, which is located inside the birdhouse and holds the roof. The sleeve must fit exactly into the inside of the birdhouse. The roof is attached with screws or undercuts of driven nails.

♦♦♦

5. Pin the perch. A plank with protruding edges can be pinned to the back wall. This will make it easier to attach the birdhouse to a wall or tree trunk.

Other recommendations
Do-it-yourself garden crafts best not to be painted. But if desired, this can be done with water-based paints. They do not have an unpleasant smell for birds. You can paint in any color, but it is better to choose green or brown shades. You can even make a beautiful composition.

Set a birdhouse at a height of 3-5 meters. When installing, slightly tilt it a few degrees forward. This will allow water to drain faster from the roof. The back wall is better to install a birdhouse in the direction of the prevailing winds. Then the cold air will not get inside.
It is necessary to clean the bird house in winter. Walls are washed with a potassium permanganate solution, previously doused with boiling water. Also take out all the garbage from the birdhouse. Thus, they protect future settlers from various parasites: ticks, bugs, fleas.